11/13/2017

Installing FCP7 on a 2007 Mac Mini

Final Cut Pro 7 (part of Studio 3) can be installed on a 2007 Macmini2,1 Intel Core 2 Duo running Snow Leopard 10.6.8

Tip!  A very important thing to know

If you run xrdp (or vnc) to remotely access your Mac, be (very) aware that the VRam reported by the video card will be incorrect if you do not have a "real" monitor plugged into the Mac. Or presumeably an EDID "emulator" to convince OSX it has a real monitor attached. (Errors) that will prevent application startup will occur even if the directions below are followed and no monitor is currently plugged in. minsys.plist adjusts the Blocking test during install, but the app also checks the available Vram when the app starts.. if no monitor is plugged in, it will report Zero (0) available and stop the app and quit. Plug in a monitor and the apps will go ahead and start... you can even view it on xrdp or vnc remote connection.. as long as a monitor or emulator is plugged into its graphics port.

Normally the Installer runs an app called (Requirements Checker.app) which requires at least 128MB vram on the graphics card to install.

However this is controlled by a plist file called minsys.plist

The installer can be copied from the install DVD to a folder on the Mac Mini, then Finder can be used to navigate to the [Install Final Cut Studio] alias, right-click the alias and choose

[Show Original]

Then right click on [FinalCutStudio.mpkg] and choose [Show Package Contents]

Then right click on [Requirements Checker.app]
 - this is a package with an unusual text document icon, choose  

[Show Package Contents]

Near the bottom of the list is [minsys.plist]

Right click on [minsys.plist] and choose [Open with...] [Other..] choose [TextEdit.app] Open

Search near the bottom for "AELMinimumRAM"

Search for <string>128</string>

Change 128 to 64

TextEdit > File >  Save
TextEdit > File > Close

Return to the top of the Folder containing the copied DVD Installer software and double click  [Install Final Cut Studio]

The install should now proceed as normal, the 2007 Mac Mini2,1 Intel Core 2 Duo will pass the requirements checker app.

[After install.. which may take several hours]

Upon first start up, it will inform you the vram of the system is not 128 and quit.

Go to the Applications directory and  find the [Final Cut Pro.app] package and right click then choose [Show Package Contents]

Then open [Resources] and search for [minsys.plist]

Perform the same TextEdit.app procedure to modify the [AELMinimumVRAM] key

<string>128</string>

And change it to

<string>64</string>

Save and close the file

Final Cut Pro should now start and query for the DV deck type you regularly use, accepting it but not having one connected will produce an error, but offer the choice to continue and completes the setup of the program. The NLE will then open.

You may need to the same procedure for other Final Cut Studio apps, but not all on an individual app basis, open the minsys.plist and set the value to 64 save and close. Then the app should open. Performance however cannot be expected to be up to the standards of supported video hardware.

[After the Final Cut Pro editor starts]

You can open [Final Cut Pro (menu)] > [Audio/Video Settings...] search for the [Video Playback:] selection and change it from the default to [None] to prevent a redetection failure for the DV deck type on each startup of the FCP app.

The requirements are set to optimize the user experience, not all functions and add-ons may operate as expected and this is not a supported method of install.

Additional DVD media and a legitimate Installation Serial Number will be required.

None of this will circumvent the need for a legitimate license for the product. I believe official product support for this product has now ended, but in any event, performing this procedure to install and use the product on unsupported hardware will not be supported by the manufacturer.

10/18/2017

vdrvroot.sys fails to boot 0xc000000f

Came across a Windows 7 x64 laptop that would fail to boot, the error message was rather obscure and didn't help much.

I had a Corsair USB SSD drive with a copy of Macrium and its Microsoft DART "like" WinPE on it.

Used that to backup the hard disk contents

Then used the [Fix my Computer] option the backup program provides.

I didn't expect much.

It offered to rebuild the BCD and helpfully (prompted) for [which] volume to boot from.

Very much not like using the BCDedit program.

The defauft for an odd reason was pointed at the Recovery partition.

I unchecked that volume and checked the C:\ (or systremroot) volume.

Then let it continue.

I walked away and came back to a fully booted and waiting for password screen to start up the desktop.

A bit (shock and awe) that it was that simple.

The error message:

vdrvroot.sys fails to boot 0xc000000f

apparently is the "Virtual Device Driver for Root file systems" and the obscure BSOD Stop code 0xc000000f would appear to be pointing out that the bootable Volume pointed to by the BCD is wrong.


8/09/2017

HP SMH data source is missing, blank

For ProLiant DL380p Gen8 if you use the Hewlett Packard SPP method for installing agents and the System Management Homepage comes up with nothing for the components on the homepage. And the data source is blank, missing or not set and you go to the Settings page and cannot find a list of sources.

Basically you are missing:

# yum install hp-ams hp-smh-templates

One restores the Settings option for selecting a source the other completes the sources.

After yum installing them from the SPP repository, you (do) need to restart the hp-snmp-agents init.d script to provide the data.

And don't forget to set the snmpd.conf readonly community strings to something the hpsmh can access.


Key thing to know

When installing the agents from SPP from now on, they broke the packages up into still more packages, if they all aren’t installed, then SMH will have no data source and be blank.

From this:
yum --disablerepo="*" --enablerepo="spp" install hp-snmp-agents hpssa hponcfg

To this:
yum --disablerepo="*" --enablerepo="spp" install hp-snmp-agents hpssa hponcfg hp-ams hp-health hp-smh-templates hpssacli net-snmp net-snmp-utils

The following are also good cli checks

[root@host ~]# snmpwalk -c public -v 2c  localhost 1.3.6.1.4.1.232.2.2.4.2.0

SNMPv2-SMI::enterprises.232.2.2.4.2.0 = STRING: "ProLiant DL380p Gen8"

[root@host ~]# hpssacli ctrl all show status

Smart Array P420i in Slot 0 (Embedded)
   Controller Status: OK
   Cache Status: OK
   Battery/Capacitor Status: OK

[root@host ~]# hpssacli ctrl all show

Smart Array P420i in Slot 0 (Embedded)    (sn: 009999999999999)

[root@texasvmhost ~]# hpssacli ctrl slot=0 pd all show

Smart Array P420i in Slot 0 (Embedded)

   array A

      physicaldrive 1I:2:1 (port 1I:box 2:bay 1, SAS, 0 MB, Failed)
      physicaldrive 1I:2:2 (port 1I:box 2:bay 2, SAS, 1200.2 GB, OK)
      physicaldrive 1I:2:3 (port 1I:box 2:bay 3, SAS, 1200.2 GB, OK)
      physicaldrive 1I:2:4 (port 1I:box 2:bay 4, SAS, 1200.2 GB, OK)
      physicaldrive 2I:2:5 (port 2I:box 2:bay 5, SAS, 1200.2 GB, OK)
      physicaldrive 2I:2:6 (port 2I:box 2:bay 6, SAS, 1200.2 GB, OK)
      physicaldrive 2I:2:7 (port 2I:box 2:bay 7, SAS, 1200.2 GB, OK)
      physicaldrive 2I:2:8 (port 2I:box 2:bay 8, SAS, 1200.2 GB, OK, active spare for 1I:2:1)

5/23/2017

Raspberry Pi Zero W - Streaming Webcam

I've been swamped by travel and things to occupy my time. But the $10 dollar Raspberry Pi Zero W has been on my list of things to do. I wanted to reuse a Logitech Webcam and use the Pi Zero W as an on demand streaming server.

The Pi Zero W is basically the circuit board with the empty row of header pins in the black plastic box with a clear top and sliding door to expose the header pins, if installed. It has one microUSB power port, one microUSB OTG power and communications port. And a microHDMI port to the right and a microSD card port on the right end. On the left end is a Pi Camera port.. which I didn't use.

I used a microUSB OTG to Type A USB 2.0 adapter, which immediately made a Left turn and blocked the lesser used (power only) microUSB port. The adapter has a pass thru microUSB port which is used to power the Pi Zero W.

The MACBOOK multi-function Lan Adapter is hanging off the USB 2.0 port and provides an Ethernet port, two Type A USB 2.0 ports, a full size SD card slot and microSD slot.. as well as having its own external power port.. should other devices need more power than the Pi can share over USB.

Both the multi-function adapter and the webcam get their power from the Pi over USB.

I have tested this with POE to microUSB and it works fine.. so CAT5 cabling to remote locations is possible.. even where WiFi is not available.. and there is no high voltage mains available.

The Noob or Raspbian Debian distro based on Jessie is the default start up Operating System and provides an LXDE desktop and a lot of apps in a meager 8 GB. I use a 32 GB microSD card and win32imager to write the raw disk image to the microSD card. The reason for over provisioning is write level wearing means the card lasts longer the more extra unused space is available.

Networking is configured to start up via DHCPv5 but has a flaw.. if the DHCP server isn't available a hard coded -1 option in the daemon startup defaults means it quits and doesn't continue to try to grab a dhcp address.. so very often in edge conditions.. the Pi will fail to obtain an IP address... and never try again.

The solution to that is hard code an IP address in the /etc/dhcpcd.conf file at the bottom of the file as specified in the dhcpcd.conf man pages. Doing the same for wlan0 might also be advised, as a backup measure.. but be careful of routing loops or duplicate default routes.

The Ethernet  setup involves

1. editing the /etc/dhcpcd.conf

pi$sudo vi /etc/dhcpcd.conf

.. and placing something like the following at the bottom

interface wlan0

static ip_address=192.168.1.25

interface eth0

static ip_address=192.168.2.185
static routers=192.168.2.1
static domain_name_servers=192.168.2.1 8.8.8.8


The WPA2/PSK setup involves

1. scanning the WiFi air space for SSIDs

pi$ sudo iwlist wlan0 scan | grep ESSID

2. using the wpa_passphrase command to generate a configuration stanza

pi$ sudo wpa_passphrase "testing"

.. which will prompt for the WPA2 pre-shared key (the WiFi password)

3. copying the output lines from the wpa_passphrase and putting them in

pi$ sudo vi /etc/wpa_supplicant/wpa_supplicant.conf

.. after all of the lines already in that file

4. then performing a reboot or manually command ifup wlan0

pi$ sudo ifdown wlan0
pi$ sudo ifup wlan0

Setting up the Pi should always begin by running the command

pi$ sudo raspi-config


Its a whiptail (menu of menus) traversed with the keyboard and no mouse.


A gui version exists, but is incomplete.

Raspberry amd RealVNC have a shared history and Pi with Jessie now comes with a free Home use Cloud edition of RealVNC which can make the Pi desktop a "server" accessible from anywhere in the world.. similar to the Teamviewer style shared desktop programs over the Internet. One simply downloads the RealVNC "viewer" and it starts a cloud "address book" of all the RealVNC servers you have configured to attach to your cloud addressbook when they come online. From this addressbook a live connection can be established in spite of firewalls or nat routing challenges.

Every menu option should be looked at, the Pi is by default tailored for Great Britain and that locale, keyboard and timezones.. and many other options are not what you want to be using anywhere else in the world.. even the WiFi radio bands are configured here.

If you decide to disable the X-Windows server and run the Pi by command line only, the option is in the menu. If you want to start the SSH server, the option is in the menu.. all the basics you'll want to change are in these menus.. explore and be aware.. its cleaner than hacking at the infrastructure based on experience with other distros. (BTW) sshd is disabled by default, and permitrootlogin is set to prevent it.. to change either you'll need to visit the /etc/ssh/sshd_config file.

All of this to say you'll probably need a microHDMI and  and usb mouse and keyboard. I got along using a logitech RF mouse and USB nubbin to connect that to the Pi, then a Bluetooth keyboard using the Bluetooth systray icon to pair the keyboard with the Pi Zero W.

There are "unsafe" ways of post-writing the Jessie Pixel image to the sdcard (to) mount the filesystem and configure a few things.. but the hazards are real and time consuming.. go the monitor and mouse, keyboard route and it will go much faster and safer. Use the raspi-config command !

After all that you might want to apt-get update, and possible apt-get upgrade your version of the operating system; and use apt-cache search to find useful packages.

Not all useful packages are in the Debian Jessie repository however, some may need to be added to get packages of a more unique nature.

And some code drifts in and out of development favor and is only available by subversion or git repositories and must be compiled.

apt-get install vlc

is a nice one to have

mjg-streamer is also very nice to setup a streaming webcam, without fswebcam, ffmpeg or vlc but parts may support it.

This Raspberry Pi Forum article details how I got it working, following their directions and finally fixing the startup script main command line to avoid a typo and add the path to the webserver content.

mjpg-streamer: Blank Image and No Video

The result was a working streaming on demand server with "near" realtime framerate (24 fps), that starts automatically each time the Pi Zero W reboots.

The pages also demo the different client types, static snapshots, browser streaming, java applet streaming. javascript streaming, VideoLAN client streaming and finally a demo control panel for changing the camera UVC controls on the fly while streaming.


3/11/2017

Czur, the SUNPLUS Burn file format

The ET16 scanner is based on the Sunplus or iCatchtek spca6330 image processing board. Many vendors use the same hardware components. The EKEN ("eee-ken") action camera also uses the spca6330 board and a Windows PC hosted firmware flasher called the FRM ("firmware resource manager") to perform ISP ("in system programming"). The FRM can also produce Card ISP files ("insertable memory card in system programming files") . The Sunplus BRN (""sunplus burn files") are memory "Card ISP" files

These can be used to update firmware in production devices capable of being placed in RSV mode ("read save verify" mode).

Embedded hardware comes with NAND, eMMC or SPI accessible EEPROM memory. This is where the firmware is stored. Typically its divided up into chunks or "partitions" which are accessed by the bootloader at the start of memory when start up commences.

If a generic operating system like Linux is used the path of least resistance is to format some of the partitions as "virtual disk drives" with a well known file system such as ext2, or a compressed file system like cram or squashfs. In that way a generic monolithic program like Busybox can act as many parts of the operating system in a single binary to save space while exposing a common and familar (and scriptable) toolkit and programming interface.

[- then again on second thought nothing precludes "burning" as part of a partition a small file which contains a partition "image" of a filesystem itelf, like a fat16.img file.. -]

If a more conservative and deterministic (aka reliable) or 'time critical' operating system is used like eCOS, RTOS or ThreadX then the memory chunks or 'partitions' may simply be "mapped" regions of storage accessed by the programs themselves without any file system.

The SUNPLUS BURN FILE format appears to be more of the latter type.

There appear to be three partitions, two general "resource" partitions in which general purpose tool binaries are placed, which can be anything from graphical image files to font files or actual programs.

And a third partition dedicated to "default firmware", which some might call a "bootstrap" or "boot loader" except that in this context its actually more like a combination bootloader and kernel.

Resources from the other two partitions are accessed by the "kernel" using a known offset in persistent memory devices always present on these "known" hardware component boards.

The exact architecture of the file formats is not known, however they are probably a type of ELF file format, and given the processor is likely an ARM A9 it is probably for a 32 Bit ARM processor architecture.

Its more common these days with multi-core or multi-processor chips to run two entirely "different" operating systems on each core.. one dedicated to a "time critical" -- real-time -- operating system like ThreadX, and the other to a general purpose (or easier for 'humans') to script or program [user-interface] operating system like "linux".. this is called [a]symmetric multi-processing since they do not neccessarily run in synchrony and rendevouz ("link-up") by passing messages back and forth through established methods in their operating systems.. its more like the worlds "smallest" internet of computers. - This does not appear to be the case with the ET16 scanner.. if it is running two copies of an operating system, they may be the same operating system. (I base this on observing both partitions appear to simply contain binary blobs and not a recognizable 'linux' or 'dos-like' file system).

While it is possible to use the FRM tool on a production device in RSV mode to "download" or "retrieve" the actual burned firmware and make a "backup" before flashing new firmware, or for further development and inspection.. I have not done this with the ET16 scanner.

When the binary "blobs" are retrieved in this fashion they come back and are saved on typical Windows file folders. And can be further examined.

My purpose is not so much to "reverse engineer" as to simply understand in "general" terms how the ET16 actually works.. and so much of this is from inference and observation than actual "hacking".

Besides, the Sunplus Burn File (SPHOST.BRN) or "System Programming for Host Burning" file is already provided as a "firmware update" for the ET16 as a download from a website.

"Unpacking" a [Sunplus Burn File] should be a matter of looking at each "partition" inside the singular Burn file (unfortunately not a file system you could mount) and extracting the individual binary ELF format programs. - but then we'd have to stop, since unless you had a sufficient debugger or hardware development board. The programs would not run on a PC.. perhaps inside a virtual machine like QEMU, or debugger like IDA Pro.. but that would pretty much be end of story.

One gentle man has used Python to create a few scripts to extract the ELF binaries from a Sunplus Burn File

Reversing, Exploiting und Patching an Action Camera

Martin's GitHub for SPCA-FUN python scripts

One thing that came to mind was as a 32 ELF the byte-ordering might be reversed, and this might be the case in the final Burn file as well.

I hope this satisfies a few peoples curiosity.

p.s.. The EKEN (pronounced "eee-ken") action camera uses the "resource" partitions to store "parameters" or settings which the other programs access and use while running. By tinkering with these settings they have enhanced or modifed features and behaviors of their action cameras. This is a dangerous thing to do. And it does lead to "bricking" or making their $300 to $400 cameras useless.. but explains much of the interest in "hacking" their devices.

p.p.s. Sunplus is a collection of companies in China and has a large and deep history with good documentation and a thorough patent portfolio. Not all of their documents have an English language counter part. And many of their documents are proprietary and confidential. The few public samples I have seen from many years ago are excellent and quite detailed. (I am under no NDA). Sunplus does responsible releases of public GNU code that they use, but do not include the specific binaries and scripts they are not beholding to release. -- That said reverse engineering to bring much of the hardware based on their technology under support in Linux is always ongoing and appears to take place mostly in Europe. -- From I can see Czurtek is probably under NDA and cannot release many specifics about the actual EVK software development code and hardware interfaces. They have however built a rich API on top of the proprietary code and expose what appears to be a very useful API of their own.

2/12/2017

HP Folio13, How to Fix the WiFi button

Hewlett Packard made a laptop called the HP Folio13 a few years ago. The WiFi would work for a while and then appear to stop working (even if the WiFi keyboard key was On). This is how to fix that. Basically "only" the HP Connection Manager could turn a Secondary "Airplane Mode" switch off and on inside the laptop. Later releases of the drivers on the Laptop Support page did not include the older HP Connection Manager tool. -- If Airplane mode was turned on, and the drivers upgraded, you no longer had a way to turn the Airplane mode off, or re-enable the WiFi internal switch.

Demo of Flipping the internal WiFi Airplane Mode Switch


This internal switch is [independent] of the keyboard WiFi switch, which will remain On at all times whether the Airplane mode is turned on or off. It is also "counter" intuitive, but Airplane mode ON, means the internal WiFi Airplane mode switch is turned OFF. And the two are not "Exclusive".

You can turn the Airplane mode ON, and then manually select [only] the internal WiFi Airplane mode switch independent of the internal Bluetooth Airplane mode switch. (AND) the internal WiFi Airplane mode switch "is NOT" labeled as a separate switch.. but it behaves as a separate switch.

The proof of this, is that the ERROR condition when using the Microsoft Windows Troubleshooting tool indicates the WiFi Radio is OFF and instructs you to turn it on, to resolve the problem. Which is NOT possible, because it is already ON.. toggling it back and forth ( regardless of the lighted LED state ) has no effect.


The keyboard WiFi switch has a white LED in the upper right corner of the keycap which remains ON at all times while the internal WiFi Airplane mode switch is "flipped" back and forth using the HP Connection Manager tool.

When the keyboard button is actually Turned OFF the HP Connection Manager displays a [Totally] different "kind" of OFF. ( this is "Real" Off, not "Airplane" Off )


Airplane mode OFF is much more subtle and "mis-leading" when the WiFi button is ON but the internal WiFi Airplane mode is OFF - it merely says "Off" and not "Disabled by Wireless button"


Technically, from my investigations it is a (problem with the Bluetooth sharing the WiFi button) in the programming logic for Airplane mode. You can switch WiFi or Bluetooth Off or On "while" Airplane mode is Off or On. This drums up the possible combinations to at least 6 and possibly 9 "modes" which the display interface does not accomodate. And while they "tried" to cover all combinations.. the user interface failed to do so.. and the Intel Connection Manager doesn't even try.. it just fails. -- dumbing it down.. just make sure to turn the internal WiFi Airplane mode switch OFF or On from inside the HP Connection Manager.. there is no other place you can control it.

[AND] don't try to control the Bluetooth state from the HP Connection Manager, only use the keyboard button. -- This is fundamentally what broke everything.

Upgrading the driver from the HP Support page for this laptop installs a "new" Intel Connection Manager, which cannot disable or manipulate the internal WiFi Airplane mode switch on this laptop.

You can still uninstall the Intel Connection manager, then use Windows File Explorer to browse to the C:\swsetup directory and find the specific HP spXXXX package directory and a subdirectory under the the new Intel drivers.. (avoid) installing from the top level directory that would also install the Intel Connection Manager, instead go to the drivers only directory and look for [ dpinst64 ] and double click that .. it will [ONLY] install the updated Intel WiFi drivers with NO Intel Connection Manager. Then find a copy of the older HP Connection Manager installer and install that to [regain] control over the internal WiFi Airplane mode switch.


Beware!! the fully opened HP Connection Manager cannot be used to turn the internal WiFi Airplane mode switch off and on. [Only] the right-click system tray icon (round blue ball) and going straight to the WiFi switch under the Airplane mode menu actually works.

2/05/2017

Kdenlive, a replacement for FinalCut Pro or Adobe Premiere

Opensource on Windows usually doesn't blend well. But Kdenlive is a suprisingly functional and smooth NLE - Non-Linear Video Editor that just got ported to Windows and MacOS. Free as in Beer it has all the features you would expect in the old FinalCut Pro, Adobe Premiere or Sony Vegas Movie Studio products. Multi-track, themeable and stylable its also easy to adapt the editor look to something more comfortable. kdenlive.org


It has a ton of transitions, color correction, and video and audio effects. Its built upon several ultra-portable opensource project foundations which doesn't tie it to one PC platform. Originating on KDE on Linux, it runs just as well on many vintages of Microsoft Windows and Apple MacOSX.

If your in the market for a video clip editing tool of the calibre of FinalCut Pro or Premiere, definitely give it a shot. On Windows its still so new there isn't even an installer. Its just a smallish Zip file to download and extract, and a few ffmpeg files to copy into its core program folder, and a presets folder to copy from the ffmpeg distro into its core program folder and then simply double click the kdenlive.exe - there is a warning box that currently flys up and suggests some missing icons and add-on tools.. but they are totally unnecessary. The default windows MFC control icons are both familar and makes it feel much more "native" to the Windows operating system.. and I presume the same would be on MacOS.

The Linuxscoop YouTube Channel reportedly uses it to edit some of its videos (if so):  then take a look at that channel to see if its what you've been looking for -


I would caution (a) it's "Zippy" as in fast, and (b) its not a "Storyboard" editor like Windows Movie Maker or iMovie.. those are [cut and paste] editors that let you draw a story like a train with box cars.

A Non-Linear Editor, gets its name (NLE) from the ancient artform of literally cutting film into strips called "clips" and then resequencing and splicing them together (either) one after another or even (on top) of each other to "composite" an entirely new visual scene.. this was the way Special-FX were done in Hollywood back before there were "computers" and even how the first Star Wars movie was made.

As an NLE with infinite [tracks] both above and below, Kdenlive.. can composite.

[Note: I got a an out of bandwidth question about setup. It does (Not) have a slick installer yet, its still just a Zip file download. After downloading on Windows, extract it. And download the ffmpeg Zip file which is linked from the same page. Extract ffmpeg, inside that folder are ffmpeg files, copy those over straight into the Kdenlive folder, [and] copy the ffmpeg "Presets" folder over into the Kdenlive folder. Then you can double-click on the > Kdenlive.exe and everything starts up and runs just fine. -- understand Windows isn't their primary focus.. it just happens to run extra sweet on Windows.. enjoy the Candy.] - {You add Tracks from [File] > [New] > mid-page > "Video tracks" or "Audio tracks"}

1/29/2017

Czur, How to Scan Books

Scanning books begins with capturing images using an image scanner. It also requires lighting and an environment that presents the pages one after another. When complete the operator is left with a stack of images that require processing.

During processing the images may also be read with character recognition software to create  keyword content that represents the image content. This means images can be inspected and recognized as containing language text which can be used to replace the image content in a new image-less document format, or used as a keyword map to find coordinates in the image of the page.

Finally images are bound into an electronic doc, like an ebook.

These are the steps to transforming a real book into an ebook.

A couple things to consider:

Choosing an image scanner and a lighting environment and scanning hundreds of pages per session can be a time consuming and difficult task.

Choices for the scanner are many but may be limited by available budget.

The Czur ET16 scanner is one scanner that costs less than many images scanners. It includes a lighting system, hand/foot controls to remote trigger an image scan (and autoscan which can detect when a page has been turned and automatically trigger a new image scan) and includes software to perform post processing, optical character recognition and binding into portable document format (PDF) ebooks.

It arrives as a kit that requires some assembly. The software is downloaded from the internet and installed to a Windows PC. During installation the software is activated using an activation key attached to the bottom of the scanner. The Windows PC is connected to the scanner by a USB cable and turned on. The Windows PC recognizes the scanner and completes device setup.

Scanning a book can take considerable time. It may require more than one session. Each session has an associated date and time when it began. The software tracks the date and time when each session begins by creating a new folder on the file system for each session labeled with the date and time the session began. 

To scan a book one begins by setting aside a block of time in which they are less likely to be interrupted. The Windows PC and scanner are moved to a darkened room with lighting less likely to interfere with the light provided by the scanner for capturing images. The background mat is placed below the imaging sensor and lined up with the edges of the scanner.

The Windows PC is relieved of extra running processes and the Czur software is started. A USB cable is connected between the Windows PC and the scanner. A choice is made to use the hand or foot switch  ( or to rely on autoscan ) and if necessary is attached to the scanner. The scanner is switched on.

After choosing to Scan rather than to Present.

The Windows PC running the Czur software will display the 'work table' for performing post processing, optical character recognition and binding. Before these tasks can be initiated a Scanning session must be performed.

The upper left menu [Scan] button is selected and a 'sub application' is started that searches for a scanner connected by USB cable to the Windows PC. A live 'field of view' is presented in the center of the screen which shows what the scanner can see. 

The right shows the current directory listing of the current 'date and time' session folder. 

The book to be scanned is placed in the scanners 'field of view'.

Scanning a book cover will not require holding it in place. Scanning the interior pages of a book may require holding the book open using fingers or hands.  The scanner will automatically process an image with color drop-key to remove fingers or hands wearing colored drop-key covers while holding a book in place. Color drop-key removal will only be performed for fingers or hands found to the left, right or below the page content.

When a scanning session is complete the [X] in the Upper Right is clicked to close the 'sub application' this will bring all of the scanned images to the work table and populate the Right navigation panel with their names.

As each image was scanned it was copied to the PC and given a filename. As each filename arrives on the PC it is "processed" based on the "profile" that was selected for the scanning session. A 'pro-file' defines how to 'process-files' for a session.

A work table full of scan images can immediately be bound into a PDF or TIFF file by going to the Lower-Right and pressing [all] to 'Select all' images. Then going to the Upper-Left and pressing 'Archive' and selecting [as PDF] or [as TIFF]. A request for a destination and filename will appear and create the 'Archive' document.

PDF and TIFF files are 'multi-page' documents which can be viewed in a PDF viewer like the Chrome browser, or an Fax viewing program.

While the above description is the simplest workflow.

There are many variable settings, controls and tools which can be used at each step to attain greater control over the overall process and final output.

Global settings such as Scanned Image resolution, Image file format, dpi and Left/Right page splitting order are chosen from the Upper Right [Settings - Gear] icon.

Session settings such as Color Mode (a combination of Brightness, Contrast and Sharpness) are selected from within the Scan 'sub application' to the Upper-Right just before scanning. And they can be tweaked somewhat by disabling [auto] exposure and manually moving the slider control underneath the preview image.

Session settings such as picking a Profile (a combination of deskew, autocrop, dewarp, page-split or none) are selected from within the Scan 'sub application'  to the Lower-Right just before scanning. Tweaking is performed upon the image files on the work table after 'sub application' is closed.

When working on images on the work table, a single image can be tweaked at a time with the controls underneath the selected file image. Multiple images can be tweaked in batch sequence by selecting all the images making up a batch group and then prototyping the changes to be applied to all of the images in the batch group from the [Bulk] menu option.

Archiving allows creating PDF or TIFF files, or OCR doc file and optionally combining those with PDF files to create a variant of the standard PDF format. These PDF variant files can include a keyword index that maps to locations within the image pages in the PDF file. This makes the PDF image document keyword 'searchable'.

The end result of a scanning session is always a multi-page Archive PDF or TIFF. The scanned images from a session are removed to ensure space is available for the next session.


1/28/2017

Czur, skinning with DuiLib

The Czur windows software has an easily modified user interface. I noticed the choice to use DuiLib when I went looking to see if I could change the keywords with Astrogrep. That revealed a simple xml text file with Chinese to English mappings. Then I got curious.


The "skin" directory contained a series of xml files and png files which looked very regular. Also the binaries included a dll library called duilib_ud.dll googling did not turn up much, but a very few hits from 2005 pointed towards a Chinese opensource project to re-use code from an effort to make user interface design simpler and better. Microsoft had released wpf - windows presentation foundation, but most felt it was too heavy and difficult to learn and that most people would not use it. Internally Microsoft was known to use simpler easier to use tools called "Window-less Controls - also" they did not release to the public. So one person Bjarke Viksoe  released an opensource project that emulated that "known but unobtainable" framework. The Chinese project DuiLib Group took this and built upon it. It was called DuiLib - Direct User Interface Library. It appears to be cross platform, adaptable to MacOSX, Linux and Windows.

DuiLib takes an XML file and a bunch of graphic files and creates controls and pastes them on a single Window which shares its window to the Window-less controls which users can interact with. Sometimes its promoted as a "window-less" user interface in that it doesn't exactly emulate the modal windows that a Microsoft Windows program might display. But instead produces "canvas" with controls layered on top. This makes it simpler in that its more like a webpage, and many of the hidden behaviors of more complete user interfaces are not available to confuse people who would not typically use them. So.. its rather like making "Pizza".. and everyone likes Pizza .. right?

So the idea of the "Skin" is just like a layered "Pizza Topping".

Hacking XML files in a text editor is not a lot of fun. Fortunately the team (called the DuiLib Group) also created a GitHub account for DuiLib Modify and released a toolkit with sample user interfaces, the duilib source code and a graphical GUI designer with a Visual Studio 2008 .sln (solution file).


That meant I could install Visual Studio 2008 and compile both the duilib library and the DuiLib Designer tool, and use that to Graphically study the Czur XML skin files.


The only problem that came up was that DuiLib is mostly documented in Chinese. And I speak English. A lot of the source code was in English, but the user interface controls were labeled in Chinese. I used a hand held visual translator to look at the labels on the screen and translated those into English by hand and compiled the DuiLib Designer as a binary release. Then I created an Application distribution project added to the VS2008 solution for DuiLib and created an install package.. Setup1.exe... and put that on the laptop attached to my Czur scanner and installed it.

It worked fairly well, though I do not have a project file with the Czur skin, DuiLib Designer can read the XML files and import all of the graphics and render the canvas panels on screen.

It is not perfect and I still have a lot to learn about the Designer. There are docs, in Chinese for it.. but I don't really plan to go as far as to create a Project. Mostly I just want to relabel controls and perhaps change the colors of a few elements.

I am not sure this could be done on an Apple Mac, and that software while close is not finished. But it might, there is no reason to think they did not follow the same design principles.

And it kind of points out this may be the direction they follow in bringing Czur to the Linux platform.

DuiLib is opensource, and its platform friendly.. not "exclusionary" or "clique-like". It has broad support and appeal for billions of people in China, and now maybe for the rest of the world. Learning about the Czur skins seems like time well spent.


1/25/2017

Czur, bookscanner Language translations

Czur scanner keeps delivering surprises. I found the user interface is based on a framework with a skinnable template. Inside the skin folder was a single Chinese to English mapping file. So it was easy to change the odd or difficult to understand word choices into something better. - since then I've recomposed most of the Scan dialog window and Publish and Bulk edit user interface windows using the translate file as a personal notebook to record my discoveries. Its gone pretty good.


Soon I hope to condense what I've learned into a few short video tutorials in English for anyone interested.

My thoughts are both jumbled and excited, but they are also getting simpler.. distilling what exactly is or will be possible and what will not.

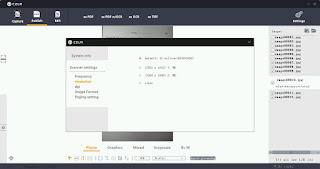
The scan dialog reduced down to just Color Modes and Profiles. The scan resolutions are preset in the application itself, but also limited by the defined capture modes pre-programed into the optical sensor device and its onboard embedded computer. In general there is a location to make a single choice for the default resolution, which is pretty good. Custom choices are possible, but the default is dense enough that other than using it for a microscope it should be sufficient. Lighting, Gain, Contrast and Brightness adjustments, also while possible are preset in the Color Modes. So when capturing they really are not a concern.


Once a single image is captured with a scan, it is uploaded across USB to the computer, where the chosen "Profile" for the session, continues post-process the image files into their "temporary presentation mode". But they carry all of the original captured image information in this form so they can be reverted back to original form and re-converted into other Color Modes or Profile types. What actually occurs in the "post processing" depends on which Profile was selected.


For example the one for single flat pages does far less, than the profile for double bound pages like those in a book. Where the single flat profile will straighten and crop and stop. The double profile will square the curve linear lines projected by the laser beams, then construct a map of the dual page surfaces and attempt to flatten the pages. Then that profile will automatically cut or "split" the single page into two separate files.. and depending on a global option as to which should come first in a stack.. Left Page then Right Page, or vice versa.. each is written out with an automatically generated name. Right Page then Left Page order is also a selectable global option.


After capturing scan images into these "temporary" session files, closing the Scan window takes one back to the worktable, in which the temporary files appear in the file list panel to the Right.

They must be individually or in 'Bulk' selected in order to perform a "Publish" operation.

The Publish menu choice then offers to (a) create a simple PDF (b) create an OCRd and indexed, therefore 'searchable' PDF (c) create only an OCRd searchable index or (d) create a lossless multipage TIFF file with or without compression.


Lossless is better for archival purposes. The original captured image is used to create the second generation lossless copy, but the degradation stops there.

If you attempt to close the worktable before Publishing, it will warn you that all of the session scan images will be wiped from your work space and will be subsequently unrecoverable.

On the worktable are tools to basically "tune" or "convert" choices made when the original reference scan images were captured. These can only be used on the current session scan images. While other previous session images, or other suitable images can be included and inserted into a current session document, they cannot be edited with the tools in this session.

A final menu option is for performing each "tuning" tools action on a group of selected scan images sequentially one after the other in a Batch mode. This is computationally intense and time consuming, but the batch function provides a scheduled job list and task schedule to monitor the situation.

Other document or ebook creation software packages should be fully capable of working with the session scan images and exported or saved TIFF files and go further in a more comprehensive archival documentation project.. for example if adding EXIF meta data, or sRGB, adobeRGB color space information is important for you... you can with supplemental software if your willing to purchase and learn how to use it. The Czur kit however will serve as ample low cost training wheels if a $500 or annual subscription to Adobe products is not your first inclination.

It is important to acknowledge that due to practical USB transfer speed, and most peoples patience, the scanner only provides access to JPEG compressed images of a relatively high resolution. Saving them as TIFF will insure they do not loose any more to generation loss.


The scanner is also a UVC compliant camera, and exports USB Endpoints, some which advertise YUY2 ... so 'lossless' images of lower resolutions are possible.. if that is a real need.

I have had a chance to preview the OSX version of the scanner software and it appeared to support a similar work flow.. which is very generic, well supported and well understood.

I have also had a chance to preview the Twain32 driver and it works well.

And I have seen, though not worked with a set of exported functions which would allow any program capable of Win32 COM calls to take control of the scanner over USB and perform most of the same operations as the provided application software.

Detractors are that there is a language barrier, and it is not a finished product or project. Firmware and application software is still being developed and released and its support base for other operating systems is still expanding. It is a USB video class device so there should be no limits.

But on the other hand it is extremely "open" to end users and Third party contribution and development, other than tiny and specific technical details and specifications of interest primarily only to the hardware manufacturer it is very accessible. An SDK, Windows App and Windows Twain32 driver, Apple MacOS software.. and a generic UVC interface make it a very attractive learning project.

p.s. I took a look at the MacOS El Capitan [Beta] software as well and it seems to be a perfect feature match, minus only the Save as TIFF feature for the moment. It is not bug free, there are a few bugs, but with patience and experience it is very usable. The "skinnable" user interface Language translation files are also there "in a way", they are not XML files, but plain resource files. I haven't played with them yet.. but if they behave the same I could likewise adapt them for myself.

There are a few reasons for pursuing a Document scanner/Book scanner at the low end of the market. First they have dramatically fallen in price and the software and methods have been time tested and collapsed into a very few steps. Where we used to worry about "eternity" we now generally only worry about the next few years and accept the archival formats will not be "perfect". So archiving a cookbook, school book, or favorite magazine seems much more likely. Dressed up as a stylish desklamp or as more functional furniture than high speed book "ripper" it resonates practicality.

Some might ask why not use a "Point and Shoot" camera, or a moble phone.. but the problem there is one of lighting and consistent repeatability. A camera or mobile phone lighting stand could be tossed into a closet and only pulled out when needed. But since this already looks like a "smart" desklamp.. why not use it as a document scanner as well.

For the cubicle bound office worker this is especially appealing since options for local storage come down to a desk drawer or precious overhead storage for the elite. In which case the Czur scanner as a personal desktop option always ready for use is especially appealing.