These are not tutorials, but "first person" new user experiences. These are what a user might experience themself. They are not concise. They are musings and guesses, and stumblings about.
Video 1. Unboxing and Assembly
Video 2. Download, Install, 2D capture
Video 3. 3D capture, OCR, PDF, fingertip removal
I believe as a result of these I can see the potential and describe a possible workflow.
The user interface controls are [not common] and I will be sending feedback to the software authors to hopefully encourage changes that will improve the first time user experience.
But its been my experience that over time people tend to become accustomed to a user interface (good or bad) and are not pleased when it changes too much or too quickly.. basically we learn to accomodate, and dislike change [especially while we are learning to accomodate].
I think the best path forward is to determine a path to accomplish a goal and then explain and demonstrate a clear path, so others can follow.
A few key discoveries are that the neck of the device has a set of three "Laser guidelines" which are projected [only] when capturing images in 3D capture mode. In 2D capture mode they are not activated. Possibly this is because the 2D algorithms for de-warping can work with a foreshortened image with a static correction, and then straighten images and text using straight line detection.
The 2D capture is pretty good and subtle.
The 3D capture is also really good at "flattening" the images and removing the depth or Z-Axis distortion introduced by the curvature of a bound book bent back against the natural curve of its spine. This is a useful feature because often the integrity of the book does not allow its disassembly for scanning. A non-destructive scanning method will be used much more often since the book is not damaged or destroyed in the process. And its much more convenient since preparation for scanning is minimal.
This also means a cradle and a platten for "pre flattening" the image is not necessary, minimizing the work area needed and the supplementary equipment on hand, such as a cradle. The result is that although the angled overhead scanning unit is cumbersome, its not entirely non-portable.
As shipped its comes in a very small box, but its easy to imagine a pelican case or some type of otter box might exist which could hold the assembled unit and be made ready for transport.
My impression with the build quality is somewhat middle of the road between inexpensive and high quality. It is sturdy, but its is made of plastic. It has a silky rubberized touch finish which makes it easy to grasp and prevents awkward light reflections which might interfere with an image scan.
Since the scanning head does not move, and the guide lines are fixed, there are no moving parts, which means there is less to break down and virtually no consumable items like rollers, gears and motors which could fail over time. No electronic device is perfect and all have a life cycle in which they are practical and usable, before being superceded by something else or something better.
All electronic devices can fail, but the unit makes use of LED and semiconductor Lasers, it has ample head vents to dissipate heat from the main circuit board. There does not appear to be any type of fan to blow air across the board (it is passively cooled), so it is completely silent. Unlike other scanners, it makes no "click" no "whir" -- no sound at all. There are occasional "beeps" and feedback from the USB PC capture software on the personal computer but all of those are completely within the control of the user.
The document or media being scanned does not need to be moved during the scan, and unlike v-shaped cradles and glass the only user intervention with the media is positioning and turning the page. And to position the page the overhead scan unit has a full color LCD panel with a "live" realtime display of what is placed in its field of view. Even if you used a cell phone as an image acquisiton and capture device, it is not usually optimized for that purpose and aligning the optics can be problematic. The Czur is preset and knows how far it is from it field of view.
The USB PC capture software also produces a full color live preview of what is in its field of view.
Scans in the various capture modes can be triggered from the PC capture software by clicking on a camera icon, or by triggering a capture from the Czur scanner itself, there are two USB ports on the back. One of USB Type-A for connecting a USB cable to the PC. One of a USB Type-B for connecting one of several types of triggering devices. As ordered my scanner came with a hand button and a foot button or "pedal".
The hand button enabled me to trigger a capture while standing at the unit and to prove that repeatedly clicking the button as fast I could would cause a dual indicator on the live overhead scan head LCD panel to show images buffered and total images captured. The buffered images are stored within the overhead scan head unit until it can offload the images to the PC. There is at least 1 GB of storage to hold these buffered images. That is 1000 MB. The average image size is 3 to 4 MB, so that would be somewhere in the 500 captured image range. But even at its slowest across USB 2.0 (the standard used by the Czur scanner) it can offload those images faster than new images can be captured. I was never able to click faster than to build up a buffer of 2 to 3 images. And when I stopped capturing new images they quickly drained to the PC.
The interval between sequential page turing and captures appear to be as low as 1-2 seconds.
Image quality will of course depend on lighting conditions, and the profile selected for scanning.
Images can immediately be post processed to change the hue or gamut of the image, which is important since the LEDs lighting the field of view have a slight bluish tinge to them. By default the profiles include [original, seal, b&w] and a few others, with "tweaking" controls for brightness, sharpness and purity (saturation?) while examining an image.
The post processing tools contain the usual, re-positioning, left and right rotation about the image center, cropping.
Binding includes the ability to perform OCR while also choosing to produce a PDF in portrait "single face" or landscape "double face" modes (1F or 2F) some would call these single document or multi document mode (a kind of openface or page layout mode).
OCR can also be performed directly on an image and used to create a Microsoft Word document which I have confirmed is in a compound document format (so microsoft office 2003 is not supported, only microsoft 2007 or above). It can also save the results to a Microsoft Excel document format.
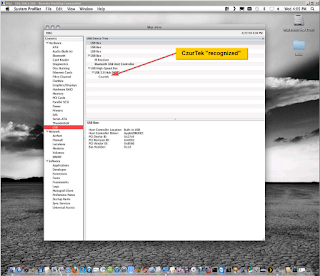
For Mac OSX users there is not a PC capture program available yet, however there has been some mention of a future software package that supports Mac's or the TWAIN scanning standard.
I have connected the Czur to a Mac .. when it was connected to a Microsoft Windows PC the device driver indentified the scanner as an imaging device with a USB universal video device.. which means OSX will probably identify and possibly work with it as an enhanced Webcam or Video input device.
That opens the possibility of using the Mac OSX (Preview) program as a "Stand in" for PDF document capture. The problem that will remain however is that it will not take advantage of the built-in features to assist in 2D and 3D de-warping of the image such as the Laser guidelines.

That opens the possibility of using the Mac OSX (Preview) program as a "Stand in" for PDF document capture. The problem that will remain however is that it will not take advantage of the built-in features to assist in 2D and 3D de-warping of the image such as the Laser guidelines.
This is something I plan to test, albeit I have only an older Mac Mini 10.6 to test with on hand.. I may borrow a MacBook Pro soon to attempt this with a newer version of the OSX operating system.
I still have not removed the plastic film which covers several parts of the scanner.. and I wonder if it covers the optic lens. The film is obviously there to protect against scratches during manufacture and transport. But it also frequently causes webcam manufacturers to receive poor reviews as customers complain of out of focus images. -- mental note to be sure to remove the "film".
So far I have tested the HDMI presentation mode, and USB PC capture mode.. the remaining option is the WiFi capture mode.
WiFi capture mode involves creating an account on the Czurtek website and associating the scanner with my local WiFi subnet, to allow it to get on the internet. I'm somewhat concerned about this mode since I also noted it installed an Audio device driver on the Window PC when the USB PC capture software was installed.. why would a scanner need an [audio] device? Is it a microphone or speaker device?
Regardless testing the WiFi capture mode is next.
In theory scans captured in the WiFi mode will be uploaded to the Czur "cloud storage" account where they can then be accessed from other devices both on my local area network, or anywhere on the internet. While WiFi should be faster than the USB 2.0 standard for offloading images, it will also depend upon my ISP providers upload bandwidth, Czurteks server speeds, and then the entire download infrastructure to whatever device accesses it. This could be convenient, or somewhat problematic. Unless there are additional feature advantages to be had, the USB PC capture option may be the preferred mode of operation.