1/29/2017

Czur, How to Scan Books

Scanning books begins with capturing images using an image scanner. It also requires lighting and an environment that presents the pages one after another. When complete the operator is left with a stack of images that require processing.

During processing the images may also be read with character recognition software to create  keyword content that represents the image content. This means images can be inspected and recognized as containing language text which can be used to replace the image content in a new image-less document format, or used as a keyword map to find coordinates in the image of the page.

Finally images are bound into an electronic doc, like an ebook.

These are the steps to transforming a real book into an ebook.

A couple things to consider:

Choosing an image scanner and a lighting environment and scanning hundreds of pages per session can be a time consuming and difficult task.

Choices for the scanner are many but may be limited by available budget.

The Czur ET16 scanner is one scanner that costs less than many images scanners. It includes a lighting system, hand/foot controls to remote trigger an image scan (and autoscan which can detect when a page has been turned and automatically trigger a new image scan) and includes software to perform post processing, optical character recognition and binding into portable document format (PDF) ebooks.

It arrives as a kit that requires some assembly. The software is downloaded from the internet and installed to a Windows PC. During installation the software is activated using an activation key attached to the bottom of the scanner. The Windows PC is connected to the scanner by a USB cable and turned on. The Windows PC recognizes the scanner and completes device setup.

Scanning a book can take considerable time. It may require more than one session. Each session has an associated date and time when it began. The software tracks the date and time when each session begins by creating a new folder on the file system for each session labeled with the date and time the session began. 

To scan a book one begins by setting aside a block of time in which they are less likely to be interrupted. The Windows PC and scanner are moved to a darkened room with lighting less likely to interfere with the light provided by the scanner for capturing images. The background mat is placed below the imaging sensor and lined up with the edges of the scanner.

The Windows PC is relieved of extra running processes and the Czur software is started. A USB cable is connected between the Windows PC and the scanner. A choice is made to use the hand or foot switch  ( or to rely on autoscan ) and if necessary is attached to the scanner. The scanner is switched on.

After choosing to Scan rather than to Present.

The Windows PC running the Czur software will display the 'work table' for performing post processing, optical character recognition and binding. Before these tasks can be initiated a Scanning session must be performed.

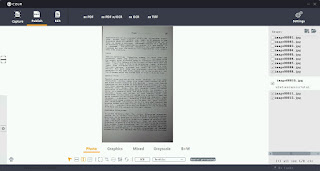
The upper left menu [Scan] button is selected and a 'sub application' is started that searches for a scanner connected by USB cable to the Windows PC. A live 'field of view' is presented in the center of the screen which shows what the scanner can see. 

The right shows the current directory listing of the current 'date and time' session folder. 

The book to be scanned is placed in the scanners 'field of view'.

Scanning a book cover will not require holding it in place. Scanning the interior pages of a book may require holding the book open using fingers or hands.  The scanner will automatically process an image with color drop-key to remove fingers or hands wearing colored drop-key covers while holding a book in place. Color drop-key removal will only be performed for fingers or hands found to the left, right or below the page content.

When a scanning session is complete the [X] in the Upper Right is clicked to close the 'sub application' this will bring all of the scanned images to the work table and populate the Right navigation panel with their names.

As each image was scanned it was copied to the PC and given a filename. As each filename arrives on the PC it is "processed" based on the "profile" that was selected for the scanning session. A 'pro-file' defines how to 'process-files' for a session.

A work table full of scan images can immediately be bound into a PDF or TIFF file by going to the Lower-Right and pressing [all] to 'Select all' images. Then going to the Upper-Left and pressing 'Archive' and selecting [as PDF] or [as TIFF]. A request for a destination and filename will appear and create the 'Archive' document.

PDF and TIFF files are 'multi-page' documents which can be viewed in a PDF viewer like the Chrome browser, or an Fax viewing program.

While the above description is the simplest workflow.

There are many variable settings, controls and tools which can be used at each step to attain greater control over the overall process and final output.

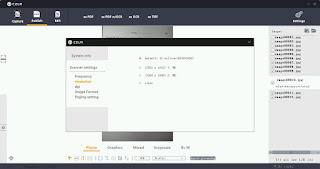
Global settings such as Scanned Image resolution, Image file format, dpi and Left/Right page splitting order are chosen from the Upper Right [Settings - Gear] icon.

Session settings such as Color Mode (a combination of Brightness, Contrast and Sharpness) are selected from within the Scan 'sub application' to the Upper-Right just before scanning. And they can be tweaked somewhat by disabling [auto] exposure and manually moving the slider control underneath the preview image.

Session settings such as picking a Profile (a combination of deskew, autocrop, dewarp, page-split or none) are selected from within the Scan 'sub application'  to the Lower-Right just before scanning. Tweaking is performed upon the image files on the work table after 'sub application' is closed.

When working on images on the work table, a single image can be tweaked at a time with the controls underneath the selected file image. Multiple images can be tweaked in batch sequence by selecting all the images making up a batch group and then prototyping the changes to be applied to all of the images in the batch group from the [Bulk] menu option.

Archiving allows creating PDF or TIFF files, or OCR doc file and optionally combining those with PDF files to create a variant of the standard PDF format. These PDF variant files can include a keyword index that maps to locations within the image pages in the PDF file. This makes the PDF image document keyword 'searchable'.

The end result of a scanning session is always a multi-page Archive PDF or TIFF. The scanned images from a session are removed to ensure space is available for the next session.




1/28/2017

Czur, skinning with DuiLib

The Czur windows software has an easily modified user interface. I noticed the choice to use DuiLib when I went looking to see if I could change the keywords with Astrogrep. That revealed a simple xml text file with Chinese to English mappings. Then I got curious.


The "skin" directory contained a series of xml files and png files which looked very regular. Also the binaries included a dll library called duilib_ud.dll googling did not turn up much, but a very few hits from 2005 pointed towards a Chinese opensource project to re-use code from an effort to make user interface design simpler and better. Microsoft had released wpf - windows presentation foundation, but most felt it was too heavy and difficult to learn and that most people would not use it. Internally Microsoft was known to use simpler easier to use tools called "Window-less Controls - also" they did not release to the public. So one person Bjarke Viksoe  released an opensource project that emulated that "known but unobtainable" framework. The Chinese project DuiLib Group took this and built upon it. It was called DuiLib - Direct User Interface Library. It appears to be cross platform, adaptable to MacOSX, Linux and Windows.

DuiLib takes an XML file and a bunch of graphic files and creates controls and pastes them on a single Window which shares its window to the Window-less controls which users can interact with. Sometimes its promoted as a "window-less" user interface in that it doesn't exactly emulate the modal windows that a Microsoft Windows program might display. But instead produces "canvas" with controls layered on top. This makes it simpler in that its more like a webpage, and many of the hidden behaviors of more complete user interfaces are not available to confuse people who would not typically use them. So.. its rather like making "Pizza".. and everyone likes Pizza .. right?

So the idea of the "Skin" is just like a layered "Pizza Topping".

Hacking XML files in a text editor is not a lot of fun. Fortunately the team (called the DuiLib Group) also created a GitHub account for DuiLib Modify and released a toolkit with sample user interfaces, the duilib source code and a graphical GUI designer with a Visual Studio 2008 .sln (solution file).


That meant I could install Visual Studio 2008 and compile both the duilib library and the DuiLib Designer tool, and use that to Graphically study the Czur XML skin files.


The only problem that came up was that DuiLib is mostly documented in Chinese. And I speak English. A lot of the source code was in English, but the user interface controls were labeled in Chinese. I used a hand held visual translator to look at the labels on the screen and translated those into English by hand and compiled the DuiLib Designer as a binary release. Then I created an Application distribution project added to the VS2008 solution for DuiLib and created an install package.. Setup1.exe... and put that on the laptop attached to my Czur scanner and installed it.

It worked fairly well, though I do not have a project file with the Czur skin, DuiLib Designer can read the XML files and import all of the graphics and render the canvas panels on screen.

It is not perfect and I still have a lot to learn about the Designer. There are docs, in Chinese for it.. but I don't really plan to go as far as to create a Project. Mostly I just want to relabel controls and perhaps change the colors of a few elements.

I am not sure this could be done on an Apple Mac, and that software while close is not finished. But it might, there is no reason to think they did not follow the same design principles.

And it kind of points out this may be the direction they follow in bringing Czur to the Linux platform.

DuiLib is opensource, and its platform friendly.. not "exclusionary" or "clique-like". It has broad support and appeal for billions of people in China, and now maybe for the rest of the world. Learning about the Czur skins seems like time well spent.


1/25/2017

Czur, bookscanner Language translations

Czur scanner keeps delivering surprises. I found the user interface is based on a framework with a skinnable template. Inside the skin folder was a single Chinese to English mapping file. So it was easy to change the odd or difficult to understand word choices into something better. - since then I've recomposed most of the Scan dialog window and Publish and Bulk edit user interface windows using the translate file as a personal notebook to record my discoveries. Its gone pretty good.


Soon I hope to condense what I've learned into a few short video tutorials in English for anyone interested.

My thoughts are both jumbled and excited, but they are also getting simpler.. distilling what exactly is or will be possible and what will not.

The scan dialog reduced down to just Color Modes and Profiles. The scan resolutions are preset in the application itself, but also limited by the defined capture modes pre-programed into the optical sensor device and its onboard embedded computer. In general there is a location to make a single choice for the default resolution, which is pretty good. Custom choices are possible, but the default is dense enough that other than using it for a microscope it should be sufficient. Lighting, Gain, Contrast and Brightness adjustments, also while possible are preset in the Color Modes. So when capturing they really are not a concern.


Once a single image is captured with a scan, it is uploaded across USB to the computer, where the chosen "Profile" for the session, continues post-process the image files into their "temporary presentation mode". But they carry all of the original captured image information in this form so they can be reverted back to original form and re-converted into other Color Modes or Profile types. What actually occurs in the "post processing" depends on which Profile was selected.


For example the one for single flat pages does far less, than the profile for double bound pages like those in a book. Where the single flat profile will straighten and crop and stop. The double profile will square the curve linear lines projected by the laser beams, then construct a map of the dual page surfaces and attempt to flatten the pages. Then that profile will automatically cut or "split" the single page into two separate files.. and depending on a global option as to which should come first in a stack.. Left Page then Right Page, or vice versa.. each is written out with an automatically generated name. Right Page then Left Page order is also a selectable global option.


After capturing scan images into these "temporary" session files, closing the Scan window takes one back to the worktable, in which the temporary files appear in the file list panel to the Right.

They must be individually or in 'Bulk' selected in order to perform a "Publish" operation.

The Publish menu choice then offers to (a) create a simple PDF (b) create an OCRd and indexed, therefore 'searchable' PDF (c) create only an OCRd searchable index or (d) create a lossless multipage TIFF file with or without compression.


Lossless is better for archival purposes. The original captured image is used to create the second generation lossless copy, but the degradation stops there.

If you attempt to close the worktable before Publishing, it will warn you that all of the session scan images will be wiped from your work space and will be subsequently unrecoverable.

On the worktable are tools to basically "tune" or "convert" choices made when the original reference scan images were captured. These can only be used on the current session scan images. While other previous session images, or other suitable images can be included and inserted into a current session document, they cannot be edited with the tools in this session.

A final menu option is for performing each "tuning" tools action on a group of selected scan images sequentially one after the other in a Batch mode. This is computationally intense and time consuming, but the batch function provides a scheduled job list and task schedule to monitor the situation.

Other document or ebook creation software packages should be fully capable of working with the session scan images and exported or saved TIFF files and go further in a more comprehensive archival documentation project.. for example if adding EXIF meta data, or sRGB, adobeRGB color space information is important for you... you can with supplemental software if your willing to purchase and learn how to use it. The Czur kit however will serve as ample low cost training wheels if a $500 or annual subscription to Adobe products is not your first inclination.

It is important to acknowledge that due to practical USB transfer speed, and most peoples patience, the scanner only provides access to JPEG compressed images of a relatively high resolution. Saving them as TIFF will insure they do not loose any more to generation loss.


The scanner is also a UVC compliant camera, and exports USB Endpoints, some which advertise YUY2 ... so 'lossless' images of lower resolutions are possible.. if that is a real need.

I have had a chance to preview the OSX version of the scanner software and it appeared to support a similar work flow.. which is very generic, well supported and well understood.

I have also had a chance to preview the Twain32 driver and it works well.

And I have seen, though not worked with a set of exported functions which would allow any program capable of Win32 COM calls to take control of the scanner over USB and perform most of the same operations as the provided application software.

Detractors are that there is a language barrier, and it is not a finished product or project. Firmware and application software is still being developed and released and its support base for other operating systems is still expanding. It is a USB video class device so there should be no limits.

But on the other hand it is extremely "open" to end users and Third party contribution and development, other than tiny and specific technical details and specifications of interest primarily only to the hardware manufacturer it is very accessible. An SDK, Windows App and Windows Twain32 driver, Apple MacOS software.. and a generic UVC interface make it a very attractive learning project.

p.s. I took a look at the MacOS El Capitan [Beta] software as well and it seems to be a perfect feature match, minus only the Save as TIFF feature for the moment. It is not bug free, there are a few bugs, but with patience and experience it is very usable. The "skinnable" user interface Language translation files are also there "in a way", they are not XML files, but plain resource files. I haven't played with them yet.. but if they behave the same I could likewise adapt them for myself.

There are a few reasons for pursuing a Document scanner/Book scanner at the low end of the market. First they have dramatically fallen in price and the software and methods have been time tested and collapsed into a very few steps. Where we used to worry about "eternity" we now generally only worry about the next few years and accept the archival formats will not be "perfect". So archiving a cookbook, school book, or favorite magazine seems much more likely. Dressed up as a stylish desklamp or as more functional furniture than high speed book "ripper" it resonates practicality.

Some might ask why not use a "Point and Shoot" camera, or a moble phone.. but the problem there is one of lighting and consistent repeatability. A camera or mobile phone lighting stand could be tossed into a closet and only pulled out when needed. But since this already looks like a "smart" desklamp.. why not use it as a document scanner as well.

For the cubicle bound office worker this is especially appealing since options for local storage come down to a desk drawer or precious overhead storage for the elite. In which case the Czur scanner as a personal desktop option always ready for use is especially appealing.


1/19/2017

LVM, Virtual Volume Management

I just got back from renewing my training experience with Red Hat Linux.

Its always full of new stuff, and this time it included details about RHEL 7.0

We haven't fully adopted RHEL 7.0 yet, but its on the horizon. If RHEL5.0 were Windows XP then RHEL6.0 would be Windows 7 and RHEL7.0 would be Windows 8 or 10. There is so much change.

But one of the things that hasn't changed is the use of LVM.

LVM stands for Logical Volume Mangement, and I had a revelation.. which I have not had before. I know not everyone 'gets it' and some even fear it. But after this 'new point of view' you might like it too.

I was sitting there in class and noticed that LVM parallels what we do with fdisk/gdisk, make file system and so forth. It was like the older partitioning tools were handling the 'Physical Volume Management' or 'PVM' where the 'LVM' tools were handling dicing up the Virtual Volumes that were created from the 'Physical Volumes'.

Its not really quite as simple as that.. but it forced a tunnel vision like focus.. that really LVM was just a 'terribly' poorly named system of tools for performing this 'Virtual Volume Management' function.

LVM truth be told is not its full name, its actually LVM2 because there was an earlier attempt called LVM1 or generically 'EVM' for 'Enterprise Volume Management'.

Enterprise Volume Management was needed because the 'Enterprise' could not afford down time, and needed to speed up the maintenance of replacing drives, extending or shrinking file systems on a live system.

This is critically important in Server class hardware systems, but why is it also useful to Desktop users?

Because the same abstraction allows re-swizeling or reallocating more or less drive space to 'Volumes' which can contain either the entire '/' root file system or any compartmentalized portion of it, like a /home branch.

Its also really nice when drive sizes out strip the ability of BIOS or a particular version of UEFI to access a block on a physical disk and need a shim, or driver provided by the hardware vendor to make it accessible.

The crux of the 'learning curve' however for newbies seems a pathological 'need' by instructors to make it sexy or 'include more stuff'.. usually tacking on things like MDRAID or synthetic software RAID, or more resilient file systems like journaled file systems in the discussion.. distracting and confusing.. and blending the information into this monolithic mess.. that leave a lot of smart people thinking they are inherent or part and parcel of the LVM system.. they are not.. they may depend on LVM to some degree.. but only as much as a file depends on a file system (any file system) for storage blocks.

So what is LVM ?

Put simply, its fdisk for Virtual Volumes.. or fdisk for Volume Groups.

You see to create a Virtual Volume (aka a Volume Group) you first need building blocks, these are called 'Physical Extents' or 'PEs' in Physical disk terms they are 'blocks' of storage. They can be made from carving up whole disks, or carving up MBR partitions of disks, or GPT partitions.. it doesn't matter.. its an abstraction of the 'Physical Blocks on Disk' to virtual 'Physical Extents'.

Once a whole disk or partition has been carved up into PEs they are then 'used' to compose or build a 'Volume Group'. (and you can 'size' these PEs independent of the block sizes on the Physical disks underneath this abstraction, at pgcreate time you can define the PEs 'size' in bytes)

A Volume Group then is like this 'Virtual Hard Disk' which like a thanksgiving turkey, needs to be carved up into smaller Virtual Partitions before you can use them, or mount them in your operating system. Those Virtual Partitions are then called 'Not Logical Partitions' but 'Logical Volumes'.. I can hear you scream.. why.. but why? are they not logically called 'Logical Partitions?' -- well that's because that term is already used down in the cellar of Physical Volume Management.. and we would not want to get confused using that term again. An MBR disk can have four and only four Primary Partitions, after that you cannot create any more.

So planning ahead you can use one of your remaining Primary partition slots to make a special 'Extended' partition.. which is never actually addressed.. except as a pointer to a chain of 'Logical Partitions' underneath... these Logical Partitions (have absolutely nothing to do with Virtual Volume "Logical Partitions").

Sooo.. waay up Topside..on top of Virtual Volumes made from Volume Groups.. we call them 'Logical Volumes'.. ironic.. irritating.. and confusing. (they're [partitions] for cotton pick'n sake..! )

Let me state that again...

A Virtual Volume (which "really" is a Volume Group) is called a Logical Volume.. grrr.

The tools for performing this magic are exceedingly simple.. but hard to remember until you master their names.. and reasons for the choice of their names.. even if that reason is rather obscure and never really discussed.

First Physical Extents (the building blocks) are "made" using the pgcreate tool. (why isn't it called pecreate? I have no idea.. grrr)

Then the Volume Groups (the virtual hard drives or "volumes") are "made" using the vgcreate tool.

Finally the Logical Volumes (the virtual hard drive "partitions") are "made" using the lvcreate tool.

1. pgcreate - "pe create" - makes virtual "leggos" or "virtual disk storage blocks"
2. vgcreate - "vhdd create" - makes "virtual hard drives"
3. lvcreate - "lpart create" - makes "virtual (logical) partitions"

Each tool has a corresponding sister tool called "xx-display" to inspect the results and keep track of the "Virtual environment"

1. pgdisplay - "pe display"
2. vgdisplay - "vhdd display"
3. lvdisplay - "lpart display"

Now once these "virtual volume - (logical) partitions" are created they can be accessed from the /dev or /dev/mapper points just like physical hardware.

And the same tools used for creating a file system can be used on logical volumes to create file systems. Mkfs could then be used to lay down a fresh xfs file system and will be handled by the kernel device driver for xfs just like a physical hardware device file system.


# mkfs -t xfs /dev/vg-group1/lv-volume1

(think of it "like" )

# mkfs -t xfs /dev/vhdd1/lp1

("or")

# mkfs -t xfs /dev/vg1/lv1


Then the mount command or the /etc/fstab file can be used to attach the new device and connect it to a mount point on the current file system.

Anything that happens below the "virtual volume" or "volume group" layer.. will be hidden or transparent to the activities of the overlaid pavement of the logical volume (aka the virtual volume 'logical partition' ) and file system.. this is the 'Enterprise quality feature,, which desktop users can also use'

If we need to add more space to a full Logical Volume file system.. we can simply add a hard disk, carve it up into more PEs with the pgcreate command and add those to the volume group, then use an LV tool called "lvextend" to make the partition "bigger" while the file system is being used.. and without backing up the contents and resizing the file system and then restoring the files (a lot of maintenance down time).

Likewise, if we need to "remove" or "replace" a disk (perhaps it failed, is failing or S.M.A.R.T. tells us its expected to fail or some other reason) we can use pvmove ( it stands for 'physical volume Move' why not PEmove ? I have no idea...), to clean out all of the PEs from one disk or partition that is part of a volume group.. without notifying the upper layers, like the LV or file system.. or user.. this "frees up" the physical hard disk or partition and we can take it out of service and replace it. All while the system is running.

The major difference between 'Enterprise' and 'Desktop' is really in the details of whether 'While the system is running' means 'hot' as in 'Live to the world' or 'warm' as in 'Being used but can be rebooted to perform some quick task then back to service'. The game is to minimize system unavailability.

MDRAID or Multidisk RAID (aka software raid) or its likewise drivers can use LVs just like real physical disks or physical partitions to create fast RAID 0 or slow but resilient fail safe RAID 1 drives or anything in between. But they really don't require LVM.

LVM can also do nice things like make Copy on Write or Snapshot images possible.. but those are not fundamental reasons or purposes for LVM to exist.

Including obscure things like ( MDRAID, CoW, journaled file systems et. al. while 'sexy' ) in a newbie introduction simply flys over the important details of LVM and serves to confuse newbies about a very important tool that has become essential in daily life.

The terminology is a quagmire of a historical word swamp and does nothing to make it understandable.


1/16/2017

Czur, project review for 2016

I don't work for Czurtek, but I contributed to their Indiegogo project and received an ET16 document or book scanner early in 2016. Here is a few thoughts on how my perception of this project has changed.

First, I don't want to make this a long article, but wanted to pull together my shifting thoughts on this project here on January 15, 2017.

When I started with the scanner I had thoughts it would be similar to a Aztec Booksnap or Fujitsu 4220c or somewhere inbetween. I was wrong.

It does scanning well and produces a collection of scan images [per session] and then provides a [work table] on which you can perform clean-up of the images individually or in bulk, then choose to create OCR - Optical Character Recognition, and bind the touched up images and the OCR information into a Searchable PDF file for archiving or reading later.

That was the dream, but it fell short in a few areas.

The Desktop PC for Windows software had some challenges in communicating what it could do, how you should use it, and in how to update it.

The Desktop PC for MacOSX software was not released and its been quite a while, but a new pre-release demo now exists which appears very similar and very good.. but so far also lacks good documentation.

The Desktop PC for Linux (if it is planned) has also not been sighted.

Over the last year I have had good luck at contacting support and they have responded with a private Twain32 driver for Windows, and an updated Twain32 driver for Windows (I have yet to review).

They have also shown me an SDK for developing programs on Windows that by-pass the Desktop software and scan images direct to the file system.

On my own I've come to understand that they are not very precise on releasing details about the chipsets or optics used in the hardware, and my guess is that this is due to Non-Disclosure Agreements with iCatchtek, or SunPlus which seem to do a good job of keeping their datasheets and programming guides off the Internet.

But on the good side, it seems the resolution and optics are so good as to put precisely considering and managing those details are not as important as they once were. From an engineering or obsessive detail persepective this can be frustrating.. but in the end really not that important. Any optical barrel distortion effects are confined to such a small field of view its just not that important.

This is also not that much different from the level of detail available for the Apple iPhone.

Its important to understand too that USB 2.0 or USB 3.0 has limits in the available bandwidth for capturing an image and moving it over to the PC across USB. Too long a delay is simply not acceptable, so often MJPEG or Motion JPEG of a high resolution is used to moved scan images across the USB cable. YUY2 (uncompressed raw) is available, but only at lower resolutions.

The controls on the desktop software are more or less like the [Auto] or coarse level controls available on 'Point and Shoot' pocket Cameras, demanding few specifics. These limited Profiles set the scanner camera, lights and image capture chip up based on the general question [what are we scanning today?] by way of -- 1. Is it a Full Color Photo? 2. Is it Color Line Art? 3. Is it a B&W Photo? 4. Is it Simple B&W Text?

Considerations like Dots Per Inch, Filters for Moire, and other things are left to "post processing" after the image is acquired.

On the PC the post processing is carried out using the OpenCV libraries.

As best I can tell the OpenCV libraries for the PC running Windows, use the DirectShow interface to create a FilterGraph, which is an object that continuously grabs frames from the scanner and passes them into a Null render object. On its was to Null however is a general purpose [grabber] object which can copy a single frame and place it in a memory buffer setup by OpenCV to receive the image, then any of the functions in OpenCV can be used to "Post process" the image in preview to optimize what will be scanned and captured then post processed into an image file on the PC.

Since the original scanned image is also available, before processing it can be saved too. This is as close to raw as we can get for now.. but its really not that important.

The major features touted for "this" scanner are the ability to "automatically" straighten or flatten the image, based on the additional ability to take a lower resolution scan with Laser beam guides. The high-res image and the low-res image are then "stretched" in OpenCV to mask and correct the 3D distortion from bending or folding until the Laser bean guidelines are straight. Quite a marvelous item in one combined product if all goes well. Some people call this "De-warping" the image.

 I am not sure how, but original images can also seemingly be re-examined and re-post processed, which suggest the lo-res image may be embedded into the original hi-res image file for possible later use.. but I could be wrong and just not understand the system.

The long term goal however is to make scanning and binding into an electronic document or eBook (in the form of a PDF) easy and without much thought. I think this would have worked.. if details about how it was handling the images were provided, and demos included clear instructions from A to Z on how to do this.

While certainly possible on Windows with the Desktop PC software, until recently it hasn't even been possible on the MacOS with the Desktop PC software.

The cloud solution seems to have trouble that users outside China experience as long unacceptable delays requiring an always connect state with the Internet.

The scanner is partially UVC compatible, meaning default programs on Windows, MacOS and Linux identify it, load their drivers and will use it for taking pictures, but generally low resolution pictures, and the default programs do not 1. provide fine control over the image contrast and brightness or colors 2. provide 2D straightening or 3D flattening 3. provide automatic OCR 4. provide a work table for touch up or binding into a PDF document.

In summary my perspective and expectations have changed over the year.

This is an Amazing product, still in development, and will be a great value when it is complete. And the renewed release of new firmware and Desktop software, the release of Desktop software for the Mac, release of Twain32 and release of a second generation of Twain32 driver plus an SDK that includes the ability to 2D straighten and 3D flatten.. all point to a very bright future for this project and product -- but -- it is not finished!

The biggest challenges are the "language" barrier and lack of sufficient documentation to not only "achieve" document scanning and binding.. but that guides and teaches.. and makes you comfortable with it.. are its biggest challenges today.

I regularly receive a lot of offline commentary and inquiry about this scanner and requests for my opinions.. but I always preface those conversations with 'I do not work for Czurtek..' so I cannot and do not speak for them.

I can say I wouldn't mind serving in some way to help with the documentation, but I think the language barrier flows two-ways.. I do not think they always understand what I am saying when suggesting small improvements that would make a 'big' difference in how people perceive their product.

Luckily I have a full time job, so the only benefit I get from making videos or answering questions about the Czur ET16 is when I learn something for myself or someone politely says a video or article helped them. And for that I thank anyone who happens to read these articles..it motivates me to keep going and not give up on the ET16..and sometimes I do feel like giving up.

But with patience and time, I can see its potential.. and that really there is nothing currently on the market like it. Its super simple, its complete, the results are really good.. and its still being improved.

Usually when something comes to market, all development stops and its frozen in feature time.

This scanner is not.. its improving and its getting better.


1/12/2017

Czur, (beta) Mac OSX scanning software

This is a demo of the Czurtek scanning software for the Apple Mac on my MacBook Pro 2012. Its really good already and can only get better.


1/10/2017

Programming, windows usb devices

I feel it useful to document by diary/journal when learning something new. In the confusion that exists before consolidating memories are "perspectives" born of a time when I did not know how things actually worked. In that narrrow twilight zone of understanding are common tropes or "pathways" that other people may travel.. perhaps because of a common heritage of prior experience. -- by documenting the misconceptions and "wrong headed" failures.. I hope other people can enjoy the "trip" and arrive at their personal destination (or similar understanding) that much quicker.

USB comes in three versions or "flavors" 1.0, 2.0, and 3.0 generally defined by their speed or data rate, but also defined by the hardware chipsets that enable the ports that physical devices are plugged into a computer.

The wire "signal" is a complex "balanced" overlapping arrangement of virtual bit trains and virtual "frame sets" which indicate chunks of information. Embedded in this stream are timing and data information and multiplexed "purposes" as there are co-existing "different" [types] of virtual pipes with differing behavior. For example, some traffic is "prioritized" over other traffic, such as for pseudo CPU "interrupt" driver processing service. Other types are for "lossy" communication in which dropped packets of data in exchange for "realtime" or "current" data is acceptable (think a telephone voice call where 'crackle or noise' is acceptable as long as the voice is pseudo-realtime and not delayed). Still other types are for absolutely "reliable" traffic even if it is delayed.

Quite a bit of the wire protocol is encapsulated inside the silicon "chips" which are embedded into the computer motherboard or inside the external hubs and usb devices themselves.

These are connected together with USB cabling to provide service.

There are standards for USB cabling and different capabilites with each type of cabling. But I won't get into those feature here.. since I'm more interested in learning to write a program or driver that opens communications and actually makes use of a usb device.

Within Microsoft Windows is an arrangement between user application and kernel applications where by the User Mode and Kernel Mode programs are written using two different sets of Headers and Libraries. Each has their own set of APIs (application programming interfaces).

For the most part these APIs are C/C++ compatible and most User Mode or Kernel Model programs are written in C or C++. Then compiled using either the SDK for User Mode or DDK for Kernel Mode. Each of these "Development Kits" contains their own "complier" customized and setup to reference the correct set of Headers and Libraries at compile time.

Traditionally Visual Studio was used to create User mode programs and Visual Studio was used to possibly edit Kernel mode programs, however when it came time to compile.. Visual Studio would use its complier to compile User mode programs and Kernel mode programs would have to be compiled manually with the DDK compiler.. this has changed back and forth between Visual Studio for both or separately for User mode programs only.. it generally depends on the era and which Visual Studio product is used.

Windows also includes a general purpose "database" which the User Mode or Kernel Mode programs can access at runtime called the "Registry". Historically evolved from a collection of [INI] files into a unified set of binary files to gain speed of access and to allow the database to grow much larger and faster than an ordinary text file based database would make possible. It also allows a certain obscurity or ofuscation (opaqueness) to the database which was later given.. even an access permission control system to prevent certain entries from being accessed or changed without the proper user permissions. All of this means even the User Mode and Kernel Mode programs have parts of their APIs dedicated to accessing the registry, which they access to make use of dynamic runtime libraries and COM/DCOM runtime objects.

All of that is history and window dressing for the main stage of developing application to access USB devices.

In the early days of windows, even in DOS, there were no USB "drivers". Each program had to initate the USB port and manage the abstracted protocol features the chipsets provided to communicated with USB endpoints which represented devices connected by USB cable.

In time however "Kernel mini-port" drivers were created to manage and "share" access first to USB Host controllers, then USB hubs, and finally USB devices. As this "Stack" of drivers came into being Microsoft sought to make driver writing simpler and faster, as well as less error prone.

So the evolution from "mini-port" drivers was to "device driver frameworks" to assist driver writers in creating drivers based on examples or "templates" which guided them in making similar drivers that had similar features.. like debugging or other features.. so that they could all be treated similarly by the overall operating sytem. -- in particular the jump from 9x (VxD) and NT kernel device drivers, was to the WDM - Windows Device Model kernel mode device drivers. (soon to be replaced by the WDF- Windows Driver Framework)... Which led to frameworks for creating all kinds of device drivers.

Specific to USB however was the establishment of the [winusb.sys] device driver which took over much of the job of older or vendor specific device drivers and co-operated with the central operating system kernel to share and manage the USB [bus] as a common "thing" that might be used simultaneously by many programs at the kernel and user mode levels.

USB is a "shared" communications medium, even if it may appear at times to be a cascading set of point-to-point connections. At any one time the total bandwidth of a singular USB port on the computer may be prioritized or divided out among many USB devices on the virtual "bus" shared by all the connected devices.

So once the WDM framework made device driver writing easier and the shared USB bus management made using multiple USB devices simultaneously possible.

Microsoft set about co-operating with the USB Special Interests Group (SIG) or USB Forum, which had shared interests in "standardizing" groups of similar USB devices and coming up with agreed upon minimal protocols to use these groups of USB devices. They were called USB "classes".. not in the sense that they were abstract Programming classes, but that they shared a common set of designs and features which could be probed and expected to exist, and thus similar drivers with "vendor specific" deviances or functions could be accessed.

The win for Microsoft was they could include [in-the-box] with a new version of Windows both a winusb.sys driver for oddball USB devices that were unique, and "Class" device drivers which would provide certain minimal services for "recognized" USB devices.

The USB devices were "recognized" by a process called discovery or "Plug and Play" detection and device driver loading.

USB devices generally have an established protocol where "descriptors" or "strings" of information can be retreived from a USB device after it is assigned an address on the USB bus.

The assigning of the USB address is a base function of the USB bus driver after a USB device is plugged in and powered up.
 Once  the "Strings" are retrieved a search of the strings returns a PCI Vendor ID "like" unique finger print which identifies the device as a possible member of a device class, and a specific vendors product. Depending on the device drivers registered in the Windows Registry or the INF flat file database an appropriate driver or driver "set" of device driver files will be loaded and start execution on behalf of the device in the Windows memory space, in general these are Kernel mode device drivers of the WDM type, a USB bus manager, device driver and class device driver.

The end result is a User mode program can start up and probe the system device list for a target which represents the USB device it needs to peform its function. And by sending IRB (Input/Output Request Blocks) to the Class driver communicate with the USB device.

IRBs are very low-level however and generally a Class driver has a predefined set of headers and library or APIs for communicating with the USB device it manages.. abstracting away (or simplifying) the level of effort required to write an application that uses the USB device.

The really hard part (I think) about all of this is knowing the history of what came before, so that not only you have perspective, but can also "filter" or "ignore" whispers of irrelevant data .. such as information about a VxD, or about a long deprecated protocol like VfW - Video for Windows, which trying to get a foot hold in the current era can distract you.. or prevent you from choosing the most appropriate API to use for the Class driver your interested in probing and using.

There are "models" within "models" describing both "abstract" representations (or "perfect" idealized models of how things work) and then "real" representations of actual devices which have [some] of the chracteristics of the ideal "model" + plus "extentions" or features that the model does not address, which you then have to figure out how to address. Some Class drivers build in (vendor specific) methods to access these other features.. but some do not.. in which case you may have to consider writing a mini-port driver to co-operate with a Class driver (an extension "plugin") .

The USB forum (or SIG) also describes many of these same things in similar but not identical terms, so that an abstract model in Microsoft documentation may not line up with the description  of the same thing in a generic USB forum Spec written with the idea of serving multiple purposes beyond Windows programming.. such as programming for Linux or Apple OS products.

The USB Specs are also [very] hard to read as the knowledge base of the authors is both jargon filled, presumptive and lacking in details, and written "backwards" or "upside down" in that they are written more like legal contracts preceeding object of discussion with adjectives or descriptions "before" refering to what they are actually talking about. In Germaic descendent languages like English, it can be very hard to [overlook] or [ignore] the fact that the document appears to have no purpose or subject matter, until "after" the discourse on the descriptions and actions.. leaving motivation to "finish" reading the Spec document..very difficult to find. (I believe) certain speakers in other languages will have an easier time reading the documents as I have seen similar "speech" patterns in other languages.  -- once "consumed" however Germaic readers can generally "re-organize" the material almost subconsciously within their mind.. much as when translating a foreign language internally.. and its easy to "forget" how hard the first reading of the material was to understand.. a certain amount of "faith" or experience in readin RFC or Spec documents may make this easier.. but for the inexperienced or "uninitated" newbie.. this can be a very difficult barrier to overcome.

In the perfect Microsoft Windows programming world. A USB device will have a high level, high functioning Class driver and the end user User Mode Application will have an available "framework" specific to their task.. such as DirectX Direct Show for Video, and the end user will not have to write a device driver, or understand many of the details of how the actual silicon or the device performs its task.. it just appears to do so..  like "magic"

A further "funny" detail is that you should not loose sight of the fact that a USB bus is a negotiation between two independent devices arbiting over communcations and services. The USB device is itself its own computer, with its own operating system (however simple that may be) and thus has its own programming. Often called "firmware", it can have bugs, it can change, and features that were available in one version of the firmware can change or be removed in the next.

Generally the USB descriptors are used as the IUnknown or COM type object feature of "discovery" and "enumeration" or list of available features.

It is through the USB descriptors a USB device provides about itself that Class drivers can setup and expose features of the device to the operating system user mode programs.

In the inital release of a hardware USB device, the firmware may not be 100 percent complete. And the USB descriptors may describe features or functions that are not quite bug free, or even implemented yet.

1/09/2017

CHM, Help 1.x files missing Contents Index Search

CHM - Compiled HTML for Microsoft files can appear damaged or unreadable. But they are not, they are often distributed in multiple "pieces" rather than a "singular" name.chm file in older Microsoft PDK, SDK and DDK documentation. (accidentally) moving only the .chm file can result in missing functions when opening the .chm file for viewing.

For example:


The image has been deliberately "blurred" to protect the rights of the publisher. However the controls and navigation pane to the Left have not been "blurred".

You will notice that The usual [Contents][Index][Search] tabs are "missing" from the tab menu.

Typing "anything" into the [ Type in the keyword to find: ] then [List Topics] is equally useless:


The word "untitled" will be returned over and over in the topics list, and link nowhere.

The problem in this case is the directory contains only "one" file:

C:\doc>
|
\_directx.chm

But the original document directory in the original install folder contained:

C:\sdk documentation>
|
\_directx.chm
\_directx.chi


The "missing" .chi file is in fact an index file, and was intended to "separate" changable information from static information when distributing the files on CDROM. It is described somewhat in this old link to Microsoft HTML Help

When you recover or "move" the .chi file into the same directory as the .chm file it (automatically) indexes "on the fly" and the results are as expected (minus the "blurring" effect I added to the image).

That is the "expected" navigation controls on the Left return and are available again.


Also the "existence" of the .chi file causes a "new" file to be created when the .chm file is opened. In fact the procedure is that as soon as the .chm file is opened a compatible .chi file is searched for in the current directory and then a new .chw file is created if the directory is "writable" - this is described as a combined kwords file.. or "chw"ords file. "k" is often used to mean "Index" file in other CHM contexts.. so this could mean "Compile Help Index Words" or "Compile Help Key Words" to support the Index and Search tabs (without the extra "k").


Its further confusing that [some] in fact [many] files compiled in more recent years, especially by third party software programmers, include the index (inside) the single .chm file.

So those .chm file behave as if the .chi file were included in the current location, but are in fact "standalone".

This change in behavior really makes troubleshooting older documentation harder, especially since Compiled Help documentation (about the CHM format) is somewhat rare.. and the change in Help document formats and ramping up of Security blockades to disable and deprecate older Help file formats. -- there simply isn't a lot of care taken to "learn from the past" and "document for the future".

Note: further online research led to the tacky "political" situation between "Public" chm files and "Private" Internal Microsoft MSDN formats. HTML Help versions 1.x 2.x and 3 or 4,5 were on a very rocky road at the end of the last Century (1999-2000) and after announcing and "using internally" a new version of  CHM they basically cancelled and did not deliver. The result was a split or division between versions of CHM 1.x and 2.x (which was never released outside Microsoft). The MSDN Library released on CDROM would use this new "splitted" CHM/CHI/CHW version.. and apparently without formal notice the SDK, DDK documentation.. and perhaps Microsoft Press CDROMs.. but it was never formally documented.

Some people took to reverse engineering the new pseudo-unoffical/official format and came up with tools and "ways" of adding their own .CHM documents to the MSDN versions.. before the later versions of CHM.. so the internal strife were recognized and "patterned" around.. which is nothing new for this era with the company.

The CHM format appears abadonned, but maintained in more and more projects, outside the oversight of Microsoft.. and as they do not maintain much of a corporate history.. perhaps the less involvement and further they get from it the better. But the standard for CHM while not open, or well documented lives on. With only .MD or HTML markup showing a hint at replacing it on GitHub.